Zooming to New Heights of Student Engagement

A colorful welcome sign.

I was a college student during the Stone Age of online education…you remember it, right? The age of mile-long content pages where, if you were lucky your professor would include a link back to the top at the half-mile marker on the page! Well, online education has changed a lot since then and there are now more ways to improve our students’ experiences.  For California Community College (CCC) faculty, one way is to  “zoom” to new heights by using ConferZoom in Canvas.

ConferZoom is the CCC-branded version of Zoom, an easy-to-use video conferencing tool that is provided at no cost to CCC educators by CCCTechConnect. Using ConferZoom changed the dynamic of my online Nutrition & Health courses by providing a way for my students to interact more organically with me and each other.  We know that retention rates increase when students feel connected to their professor and/or classmates.  Zoom provides a way for this connection to occur. Since I started using ConferZoom, I have observed increased student-student and student-instructor interactions, which are key to supporting students to  complete the course successfully.

What do I do?

klatch: a social gathering, especially for coffee and conversation

At the start of the course, I have an orientation or klatch meeting, a term I adopted from my favorite online CVC-OEI/@ONE instructor, Greg Beyrer.

In my welcome letter I invite students to my klatch online Zoom meeting and provide three meeting times from which they choose one to attend: one meeting time during the weekend prior to the first day of class and two meeting times on the first day of classes. What I have found is that some students will attend more than one of the meetings. The icing on the cake is that the klatch fulfills Section B: Interaction - Instructor Contact and Student-to-Student Contact of the CVC-OEI Course Design Rubric.

Want to give it a try?

Follow these steps:

  1. Send out your welcome letter before your class begins.
  2. Include the dates and times of the orientation meetings. It is important to let students know attending one session is mandatory and they will get credit. (My orientation is worth 20 points, more than any other week one assignment.)
  3. In your message, encourage students to join from a computer with a webcam or a mobile device so you can see and hear one another. If you are aware that a student requires live captioning as an accommodation, contact ConferZoom support in advance of your meeting.
  4. When orientation day arrives, have your klatch meeting from a computer with a webcam.
  5. Launch Zoom and share your desktop.
  6. Meet and greet your students in real time!
  7. Take your students step-by-step through the basics of your course’s navigation.

You have now demonstrated to your students how useful klatch meetings will be going forward. In a coming blog post I will share how I use the recording feature to Zoom it up a notch!

Laying out the welcome mat

UsingConferZoom for my course orientation not only sets the table for my students to get a taste of what’s to come, but it also allows me to more easily create learner-centered content throughout the term, as students can ask questions and let me know what they’d like to learn about. Their input helps me guide the klatch in the direction the students deem necessary, as opposed to being completely instructor led. I also fulfill regular and effective contact in a more substantive way.

Since personal bonds are developed through shared experiences, we can easily see the significance of bringing students together live as they are entering your virtual classroom. Ensuring the session is meaningful and provides opportunities for social connections is essential. I want my students to know that I am here and available to them, both now and going forward. I also want my students to know that we are on this virtual nutrition or health “journey” together.

ConferZoom empowers me to take the anxious feelings that online students have at the start of a course and turn them into a promise of a shared learning experience. Through this experience, students are more likely to relate to me as their guide, mentor, and comforter. They also relate on a personal level with their peers. Thanks to ConferZoom, we have faces and personalities for the names we see on the screen and our shared journey toward a healthier life.

When We Empower Students to Become Experts

Join Chelsea on a tour of this assignment in the 4-minute video above.

How might you blend research, group work, video creation, and friends and family into an empowering and equitable learning experience for your students? In the 4-minute video below, Chelsea Cohen from Laney College, will show you!

Chelsea’s students, who are English for Speakers of Other Languages (ESOL) learners, engage in a multi-stepped project, beautifully scaffolded into managing meaningful chunks. Each step of the way, students collaborate and increase their knowledge of a particular topic. Chelsea will demonstrate how extending discussions beyond the classroom or Canvas and into a students’ circle of family and friends can foster more diverse dialogue that situates a student as an expert. Can learning get more meaningful than this?

3 Steps to Becoming an Expert

  1. In groups, create a video using Adobe Spark based on your research paper.
  2. Share and discuss your video with friends and family (Extension: share the videos with your Twitter communities).
  3. Reflect upon the experience with your classmates in our class discussion. Summarize the ideas that came up with your friends and families and how it felt for you to facilitate the conversation.  

Accessibility tips! If you have a student in your class that uses a screen reader to navigate the web, you will need to provide an alternative to Adobe Spark Video. Also, if you have a student with a hearing impairment, have at least a few students caption their videos before sharing them with the class. To caption an Adobe Spark Video, download it from Spark, upload it into YouTube, and edit the auto-captions.

We suggest surveying your students in week one to let them know about your multimedia project plans and ask if they will need any accommodations. They'll appreciate your efforts to support them!

Two Canvas Blunders You Can Easily Avoid!

Did you know there’s a “wrong” way to add content onto a Canvas page? This little mistake is often the cause of broken links when you import your content into the next semester’s course shell. Come learn the best method for adding images, files and links in Canvas. (And the secret of what to do if your images suddenly aren’t displaying correctly.)

Screencast-O-Matic for Easy & Accessible Video Creation

I am the Instructional Technologist at Cañada College and I work a lot with faculty who are motivated and excited to improve their online and hybrid courses and make them more engaging for their students. One thing that gets my faculty most excited about improving their courses is being able to make videos for their students, whether it’s a short course introduction video, a set of lecture videos, or an informal check-in video.

But I also find that video can be very intimidating for those who have not yet used it . I personally was horrified at the way my voice sounded and at the facial expressions I made while recording my very first video. So horrified, in fact, that I re-recorded it approximately 56 times and then just gave up and deleted it all together. But being able to record tutorial videos is essential for the work that I do, so I tried again and kept going. And, surprisingly, I got more and more comfortable talking to my webcam over time.

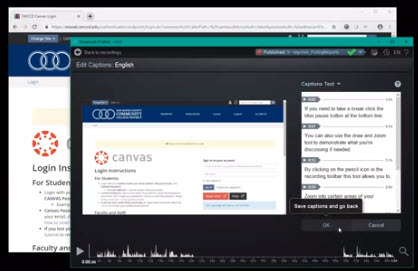
Getting more comfortable with recording yourself just comes with time and practice and a lot of patience. However, the technical side of video, which includes recording, editing, and captioning, has gotten a lot easier for me since I started using Screencast-O-Matic. I started out using the Free version, which allows you to record videos up to 15 minutes in length. Then at the beginning of 2018, we purchased a site license for the paid version and it came with some very simple, yet robust editing, captioning and uploading tools that made my video workflow so much smoother. So I’m excited to share with you my recommended recording workflow using Screencast-O-Matic. If your institution does not have a site license, educators can purchase an upgraded account for a monthly price that is about the same cost as a cup of coffee (link to: https://screencast-o-matic.com/plans#solo).

Recommended Recording Workflow

I put together a Recommended Screencast Recording Work Flow and a Recommended Face-to-Camera Recording Work Flow for faculty at my college and I made the video below to demonstrate the steps. These steps allow me to make videos quickly and relatively painlessly, but feel free to experiment with other ways of making your videos until you find what works for you.


The Screencast-o-matic
features illustrated in this video are included in a Solo Deluxe account.

Additional Resources

It can be overwhelming to know how and where to start when you are ready to try making a video for the first time. Whether you are using Screencast-O-Matic to record your videos or another tool, here are my tips and areas to focus on for the different kinds of videos you may want to make.

What’s Next

It’s my hope that you feel a little more prepared to tackle video making if you’ve never done it before, that you learned something helpful if you’re a seasoned video maker. I encourage you to test out the free version of Screencast-O-Matic and get started with making videos. Or if you have another tool at your college or one that you’re familiar with, jump in and experiment with that. The tool you use is not as important as putting the time and energy into learning and practicing the skill of video making.

Leave a comment below, or contact me via email at hughesa@smccd.edu or on Twitter, if you have any questions. Feel free to even just share your thoughts and experience with making videos, I’d love to hear how you’re doing!